Welcome to this comprehensive tutorial on Excel VBA for beginners to advanced level learners. This article is the support document for our YouTube video tutorial on Excel VBA programming video series. If something is missing in the video or needs more explanation or clarity on any of the topic, you can read this article chapter wise.
Watch VBA Full Tutorial in YouTube▶️
Click on the chapter names listed below to jump right into the chapter contents.
Chapter 4: Variables in VBA and Data Types
Chapter1: Introduction
Watch Chapter 1 in YouTube▶️
This chapter covers the basic information about VBA in Excel. It covers below topics.
- Introduction to VBA
- What we can do using VBA (Examples)
- Power of VBA foundational knowledge + AI tools
- Enabling Developer Tab (How to access VBA in Excel)
- What is Macro in VBA
Introduction to VBA
Visual Basic for Applications (VBA) is a powerful, event-driven programming language developed by Microsoft that is fully integrated into Excel and other Office applications, enabling users to transcend the software’s standard interface and automate virtually any task. At its core, VBA serves as Excel’s built-in automation engine and customization toolkit, allowing you to write macros—recorded or manually coded sequences of instructions—to perform repetitive operations, manipulate data with complex logic, create custom functions, design user forms, and interact with other Windows applications and databases. Unlike standard Excel formulas and features, which are static and limited by predefined functionality, VBA provides a complete programming environment with access to Excel’s object model, giving developers granular control over workbooks, worksheets, ranges, charts, and even the application itself. This capability transforms Excel from a mere spreadsheet tool into a robust platform for developing tailored business solutions, automated reporting systems, and interactive dashboards, thereby dramatically enhancing productivity, ensuring consistency, and solving problems that are otherwise impractical or impossible with standard spreadsheet techniques alone.
VBA Practical Examples
Using VBA we can do following things.
- Suppose that you work in a trading company. You receive sales report from your team in comma separated format. You need to change that report to a table format with visual enhancements and also do some calculations before sending it to the top management. This is your daily job. Think how many time⏱️ this task consumes. By using VBA, you can automate this process and do it just in a single click🙂.
- You are an accountant. While working in Excel, you have to write the numeric values in spelling format time and again. Think how many times it takes and also the chance of errors. By using VBA you can create a function like =Spellnumer() to convert the numeric values to spelling format.
- You work as a warehouse manager. You want to make an inventory management software with graphical user interface. You can do it using VBA.
- You want to make an application to track personal income expenses and saving. You can do it using VBA.
- You work as an admin in school/college. You want to make an application for school or college administration system. You can do it with VBA.
These are just few examples. You can develop any kind of spreadsheet-based application, automation projects or user defined functions using VBA in Excel.
Power of VBA Foundational Knowledge + AI (Artificial Intelligence)
While AI code-generation tools offer remarkable efficiency in creating VBA scripts, possessing a foundational understanding of the language remains critically important. This knowledge serves as an essential framework, enabling users to accurately articulate their requirements through effective prompts, critically evaluate the AI’s output for logical errors or inefficiencies, and skillfully adapt the generated code to fit specific, nuanced contexts that the AI may not have anticipated. Without this bedrock comprehension, users risk becoming passive recipients of code they cannot debug, optimize, or fully trust. However, the true power emerges in the synergistic combination of human expertise and artificial intelligence. A developer with solid VBA fundamentals can leverage AI as a powerful co-pilot—rapidly generating boilerplate code, exploring alternative methods, and overcoming creative blocks—while applying their judgment to refine, integrate, and ensure the solution’s robustness. This fusion amplifies productivity and innovation, transforming the developer from a mere coder into a strategic architect who uses AI to extend their capabilities, ultimately producing more sophisticated, reliable, and tailored Excel automation than either could achieve independently.
Enabling Developer Tab (How to access VBA in Excel)

If you have never used VBA, you may not see the Developer tab in Excel. Developer tab is the menu where all VBA features and tools are available. To enable developer tab, follow these steps.
- Click on File tab.
- Click on Options.
- Click on Customize Ribbon.
- In the main tab list, mark or check the Developer option.
- Click on Ok.
Now, you should see the Developer tab activated in Excel where you will find all tools and features of VBA.
What is Macro
In Excel VBA, a macro is a sequence of programmable instructions—written in the Visual Basic for Applications (VBA) language—that automates repetitive or complex tasks within Excel workbooks, such as formatting data, performing calculations, generating reports, or interacting with other applications, which can be recorded manually using the Macro Recorder for simple actions or written from scratch in the VBA Editor for more advanced, customized functionality, thereby significantly enhancing productivity by executing multi-step operations with a single command, often triggered by a button, keyboard shortcut, or worksheet event.
Chapter 2: Working with Macros
Watch Chapter 2 in YouTube▶️
This chapter covers below given topics.
- Recording Macro
- Re Use (Run) Recorded Macro
- Use Relative Reference
- Editing Recorded Macro
- Assign Macro to Shapes and Toolbar Buttons
- Saving Workbook as Macro Enabled File
Recording Macro
To record Macro, click on Developer tab, then Record Macro tool or View tab, Macros then Record Macro. It will open Record Macro box. It has four setting options.
Macro name: put any name that relates with the actions that you are recording. Note that macro name does not support space between words. To separate multiple words in macro name, you can use underscore symbol. For example, make_report.
Shortcut key: here you can set up the keyboard shortcut key to run the macro later. While setting keyboard shortcut key make sure it does not counter with other default shortcut keys of Excel. For safety, try to make shortcut keys like (Ctrl + Shift + T) or something like that.
Store macro in: here you have 3 options. To use the recorded macro throughout all workbooks that you create in your computer, choose personal macro workbook option. To use the macro in existing workbook, choose this workbook option. To use the macro in a new workbook, choose new workbook option.
Description: here put the description of macro in detail like what automation does the macro do. This is useful if you have multiple macros in the workbook. Over the time, you may forget which macro is designed for what automation project. Writing description makes it clear.
Re Use (Run) Recorded Macro
To re-use or run the macro, you can follow two methods.
- View macros from Developer tab\ Macros or from View tab\Macros\View Macro
- Click on Developer tab\Visual Basic\Modules. You will see the recorded macros in module. Locate the specific macro given in Sub() …. End Sub.
- Click on the run button. Then the specific task assigned to that particular macro will be executed.
Use Relative Reference
Like the absolute and relative reference in the Excel formulas, macro recording also has this feature. If Use Relative References option is not selected before macro recording, the macro will execute the action in the fixed location (cell or range) in the sheet. And if Use Relative References option is selected, macro will execute on the relative location (cell or range where you keep the selection).
Editing Recorded Macro
To edit the recorded macro, go to macros section following the methods explained earlier. Click on the macro to edit, then click on Edit button. This will load the VBA script of the macro, where you can change the values manually to edit it.
Assign Macros to Shapes or in the Toolbar Button
You can assign the macros to a shape or keep it in the toolbar for easy access (one click access). To assign macro to a shape, follow this method.
- Insert shape from Insert\Illustrations\Shapes (or you can also use image)
- Right click on the shape, click on assign macro.
- Choose the macro that you want to assign.
- Click on ok.
Now, the shape becomes clickable. Click on the shape to run or execute the macro.
To run macro from toolbar, follow these steps.
- Click on File tab
- Click on Options
- Click on Customize Ribbon
- Click on the tab where you want to keep the macro.
- Create a New Group, rename the group.
- Click on choose commands from drop down list, then select the macro.
- Click on the group created, then click on Add button.
- Rename the button and assign icon to it (optional).
After completing these steps, you should see the macro in the toolbar of the selected tab. Simply click on it to run the macro.
Saving Workbook as Macro Enabled File Type
To preserve the macros in the workbook, you should save the Excel workbook as macro enabled file type. For this, follow below given steps.
- Click on the File tab.
- Click on Save As.
- In the File type drop down, select Excel Macro Enabled File.
- Choose the location and Click on Save.
Chapter 3: VBA User Interface & Writing the VBA Codes Manually
Watch Chapter 3 Video in YouTube▶️
This chapter covers the UI of VBA Application and codes to do different type of tasks in Excel. This includes below given topics.
- VBA User Interface
- VBA Code to Write Values to Cell or Range
- Step By Step Code Execution
- VBA Code to Change the Font Properties
- VBA Code for Applying Borders and Text Alignment
- Using With Block
- VBA Code to Copy / Paste Data
- VBA Code for Using Paste Special Tool
- VBA Code for Row, Column and Sheet Operations
- VBA Code for Creating New Workbook
- VBA Code for Sheet Referencing
VBA User Interface
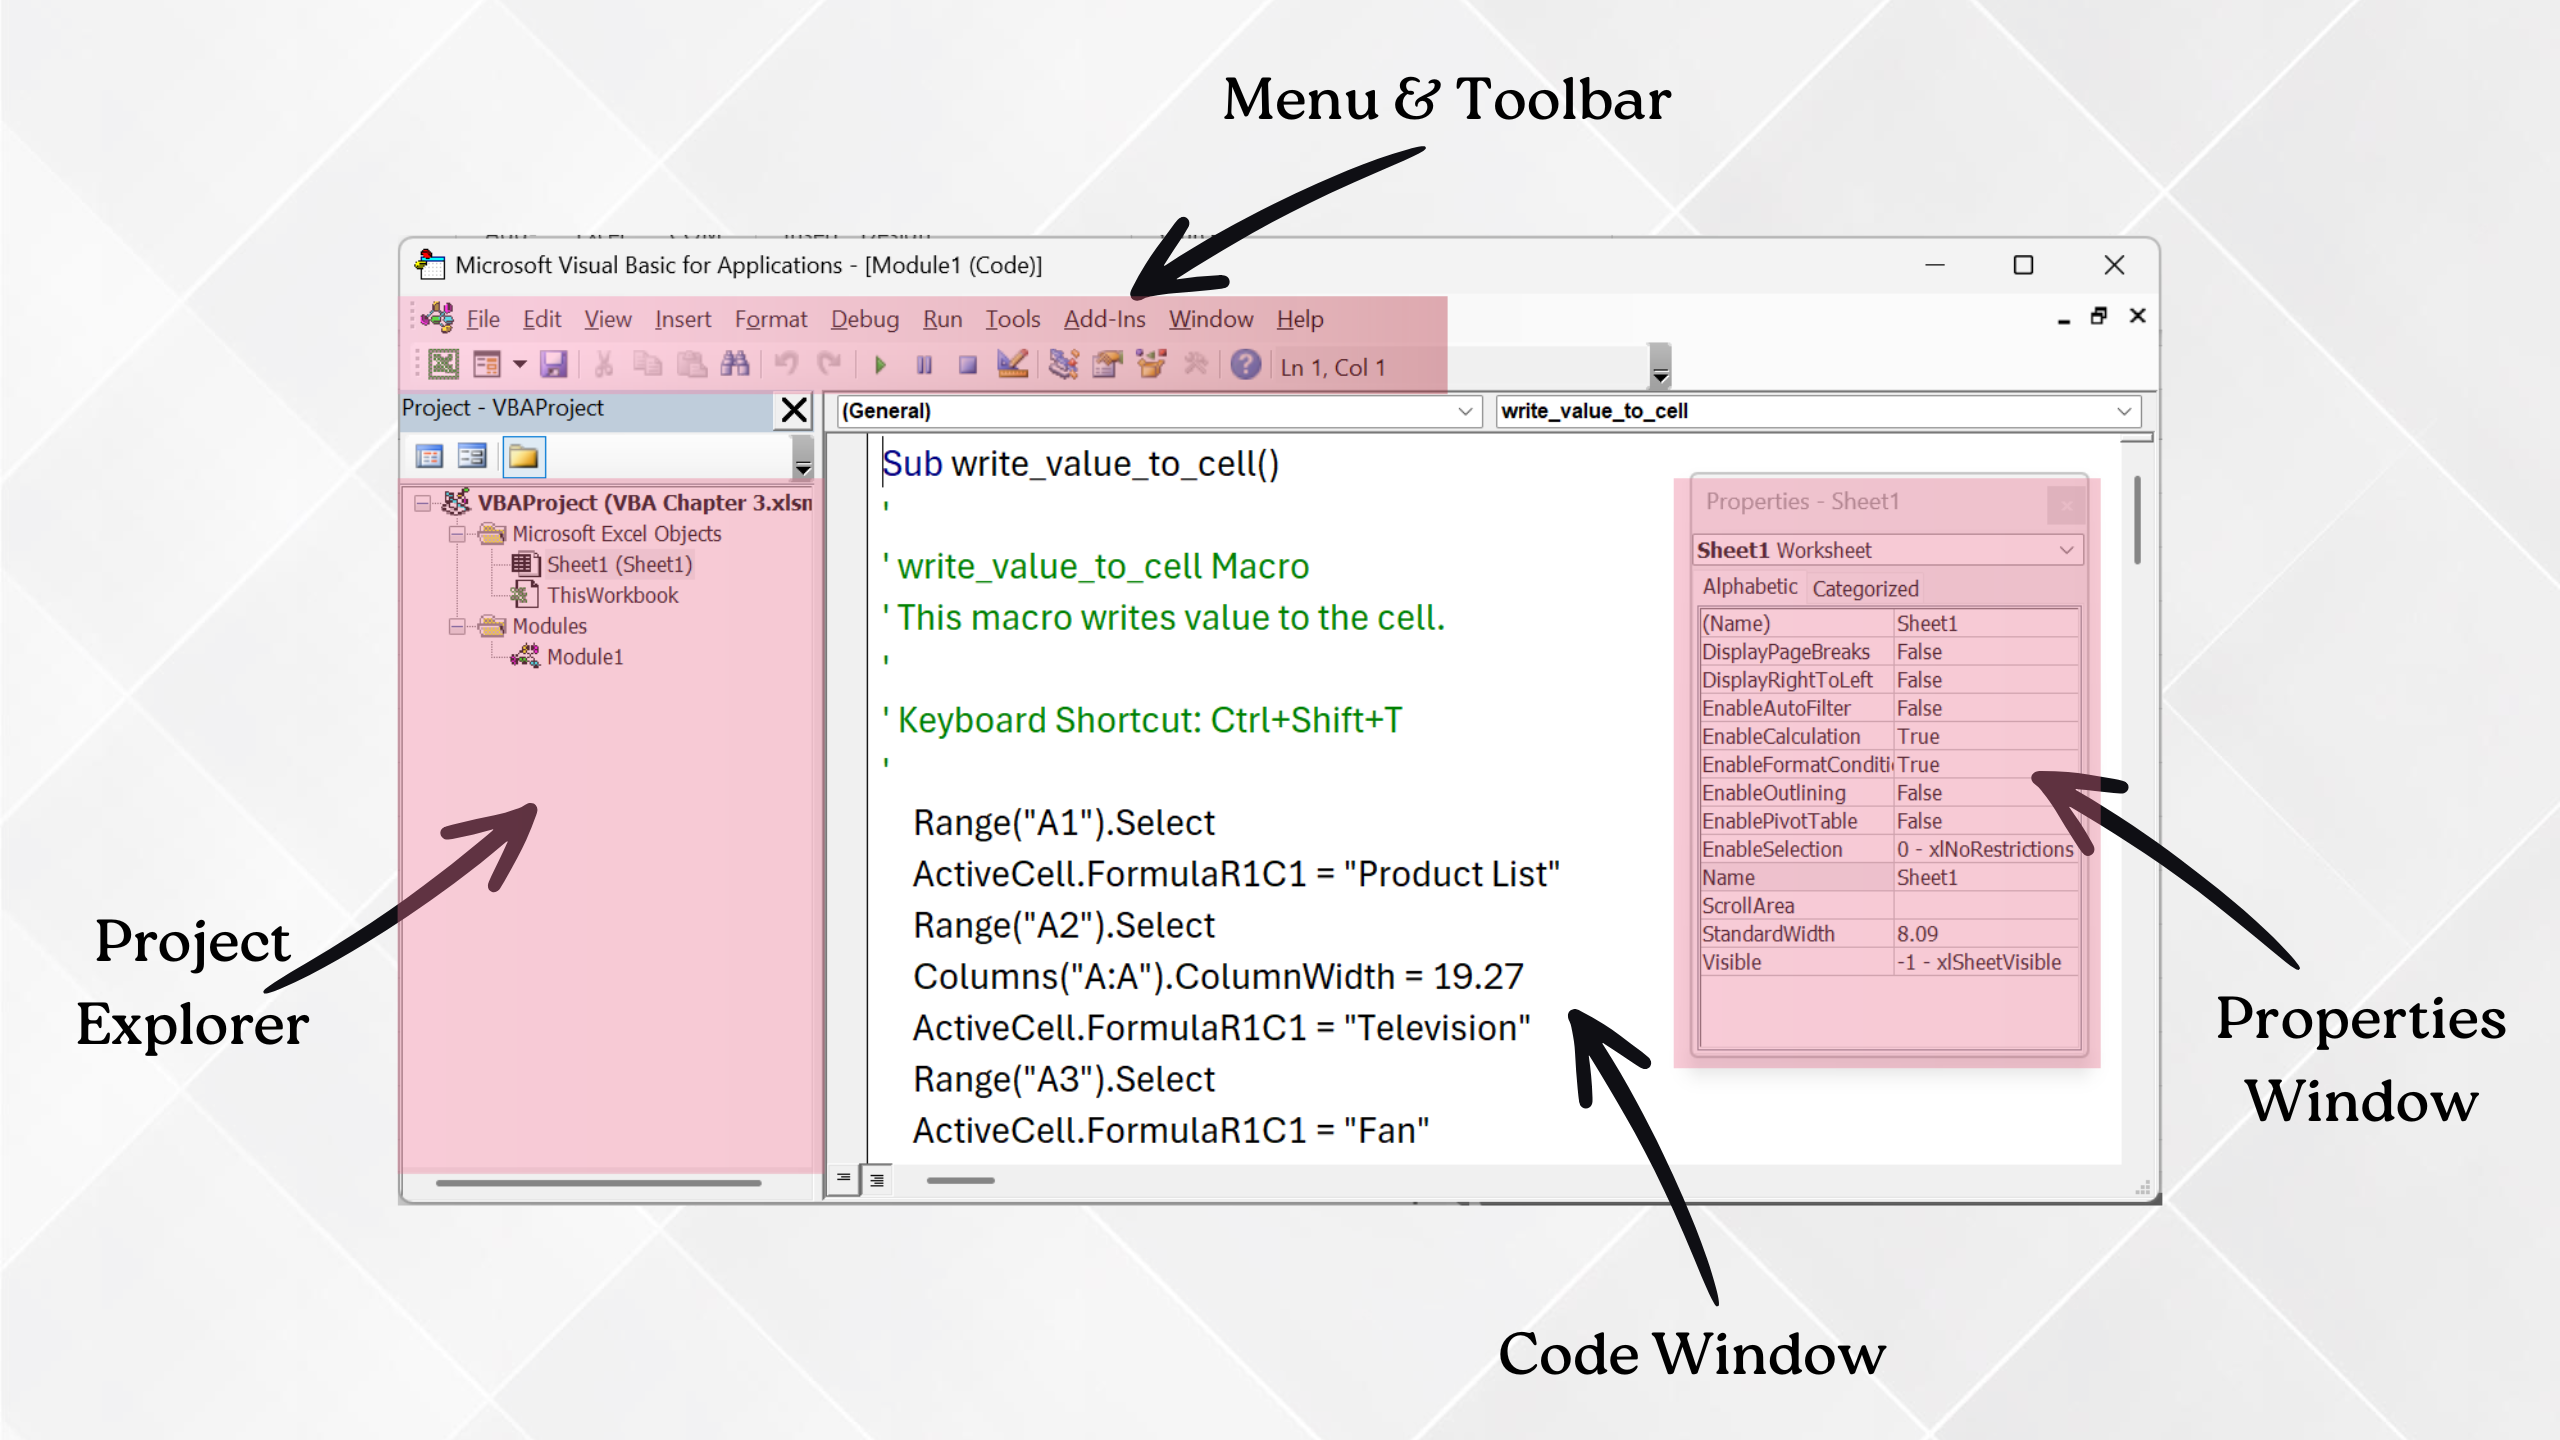
As illustrated in above image, VBA user interface has basically 4 components. These are;
- Menu & Toolbar: It has different tabs like File, Edit, View etc. Like the Excel’s tab. Below it thee are different tools. Using them we do different things in VBA.
- Project Explorer: This section shows the Excel objects like the workbook, sheets, user forms, modules etc.
- Coding Window: This section is for writing or viewing the VBA code.
- Properties Window: This shows different properties for the selected object like workbook, sheets, user forms and the control buttons used in user form.
VBA Code to Write Values in Cell or Range
Basically, there are two methods of writing values in cell or range using VBA code.
- Range Method
- Cell Method
To write the code, click on Insert menu of VBA, then Module. This will open the coding window.
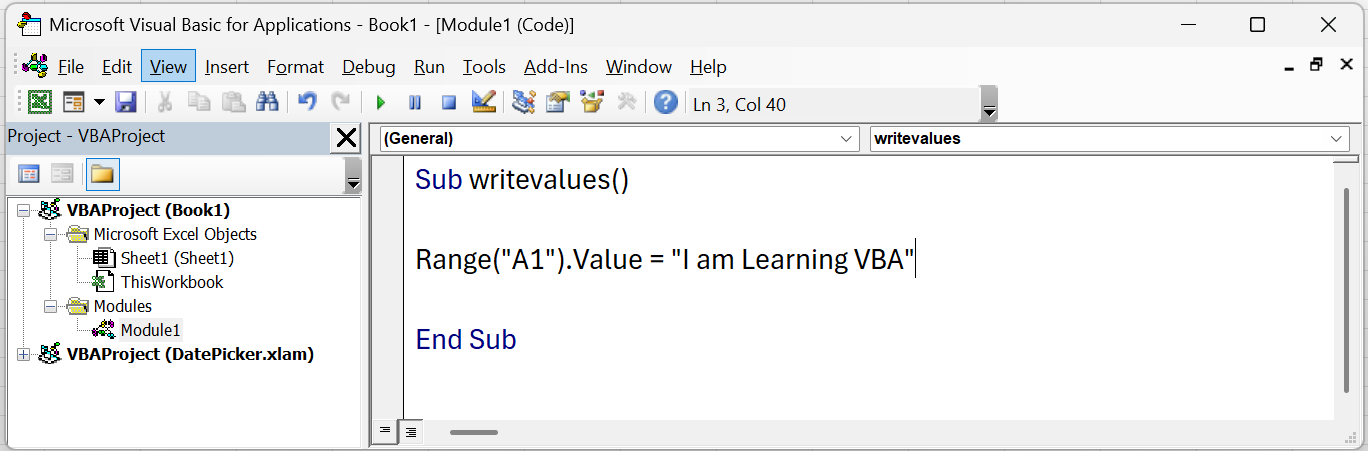
Sub writevalues()

Range("A1").Value = "VBA"

End Sub
Sub writevalues()

Cells(1, 1).Value = "VBA"

End Sub
Above codes writes the text VBA in A1 cell of the sheet.
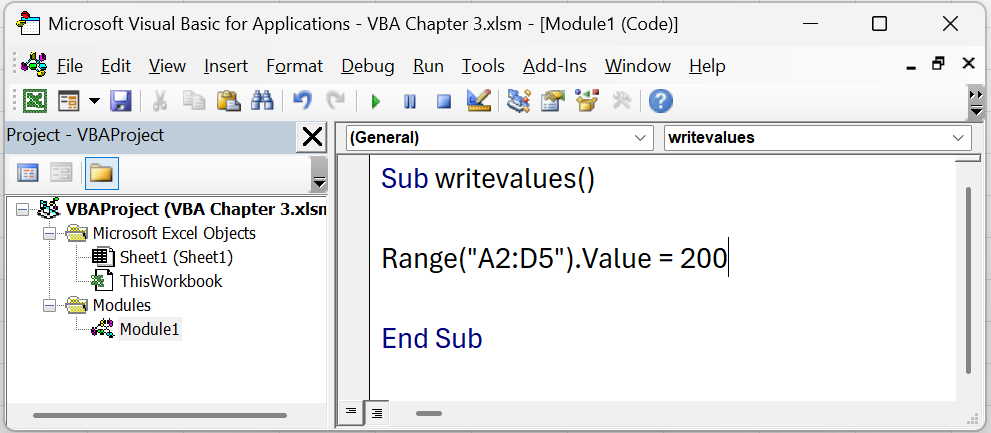
To write values in multiple cells (range) at once, write code as given below.
Sub writevalues()

Range("A2:D5").Value = 120

End Sub
Above code writes the number 120 in A2:D5 range.
Note: for text values, put double quotes (“) before and after the text and for number values do not use double quotes.
Step by Step Code Execution
To see the execution of code step by step or line by line, you can use the step into tool. For this click on Debug menu, then click on step into. The keyboard shortcut key for step-by-step code execution is the F8 key. When you press F8, the first line of code executes, when you press F8 again, second line of code executes and so on.
VBA Code to Change the Font Properties
The text after single quotes is comment or note which we can be used for more clarity on the written codes.
Sub writevalues()

Range("A1:C3").Value = "VBA"   'Writes VBA in A1 Cell
Range("A1:C3").Font.Name = "Times New Roman"    'Changes font name to Times New Roman
Range("A1:C3").Font.Bold = True    'Makes the font bold
Range("A1:C3").Font.Italic = True    'Makes the font Italic
Range("A1:C3").Font.Underline = True   'Underlines the text
Range("A1:C3").Font.Color = vbBlue    'Changes font color to Blue
Range("A1:C3").Font.Size = 22    'Makes font size of 22

End Sub
VBA Code to Apply Borders or Change Text Alignment
Sub border_and_alignment()

Range("A1:C3").Borders.LineStyle = xlContinuous    'adds straight line border on A1 to C3 range
Range("A1:C3").Borders.Color = vbRed    'changes border color to red
Range("A1:C3").Borders.Weight = 3    'Sets border weight of 3 points
Range("A1:C3").HorizontalAlignment = xlRight    'Keeps text or value at the right of the cell
Range("A1:C3").HorizontalAlignment = xlLeft    'keeps text or value at the left of the cell
Range("A1:C3").HorizontalAlignment = xlCenter    'keeps text or value at the center of the cell
Range("A1:C3").VerticalAlignment = xlTop    'keeps text or value at the top of the cell
Range("A1:C3").VerticalAlignment = xlBottom    'keeps text or value at the bottom of the cell
Range("A1:C3").VerticalAlignment = xlCenter    'keeps text or value at the center of the cell

End Sub
Using With Block
With block in VBA is used for shortening the code length and make it clear. For example, take reference of the codes for changing the font properties (mentioned earlier), if you notice, Range(“A1:C3”) part of the code is repeating in every single line. Using With block, we can keep the Range(“A1:C3”) at one place only by avoiding repeating it in every line. This makes the code short and easy to learn. See how we use with block in VBA in below code example.
Sub border_and_alignment()

Range("A1:C3").Value = "Excel VBA"

With Range("A1:C3")
    .Font.Name = "Times New Roman"
    .Font.Size = 16
    .Font.Color = vbRed
    .Font.Bold = True
    .VerticalAlignment = xlCenter
End With

End Sub
VBA Code to Copy/Paste Data
For copy and paste of data we can use 2 methods of writing VBA code.
Method 1
To copy data from A1 cell to D1 cell.
Sub datacopypaste()

Range("D1").Value = Range("A1").Value

End Sub
To copy data from A1:C3 range to E4:G6 range.
Sub datacopypaste()

Range("E4:G6").Value = Range("A1:C3").Value

End Sub
Method 2
To copy data from A1 to D1 cell.
Sub datacopypaste()

Range("A1").Copy
Range("D1").PasteSpecial
Application.CutCopyMode = False

End Sub
To copy data from A1:C3 range to E4:G6 range.
Sub datacopypaste()

Range("A1:C3").Copy
Range("E4:G6").PasteSpecial
Application.CutCopyMode = False

End Sub
VBA Code for Paste Special
For copy and paste special like values only, formulas only, formats only etc. Use code like below given.
Sub datacopypaste()

Range("A1").Copy
Range("D1").PasteSpecial xlPasteValues
Application.CutCopyMode = False

End Sub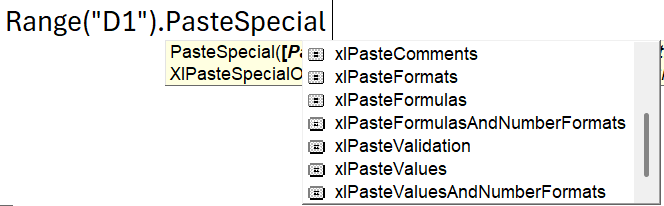
In second line of code, after putting .PasteSpecial command and a space, you will get list of paste special option. Click on an option to choose.
VBA Code for Row Column and Sheet Operation
Sub insertrowcol()

Rows(2).Insert 'Inserts one row after first row
Rows("3:4").Insert 'Inserts two rows after 2nd row
Columns(2).Insert 'Inserts one column after column A
Columns("D").Insert 'Inserts one column after column C
Columns("D:F").Insert 'Inserts 3 columns after column C

End Sub
Sub deleterowcol()
Columns("D").Delete 'Deletes column D
Columns(6).Delete 'Deletes column number 6 or the 6th Column
Rows(3).Delete 'Deletes the row number 3
Rows("2:4").Delete 'Deletes row number 2 to 4
Union(Columns("D"), Columns("F")).Delete 'Deletes column D and column F
End SubSub addsheets()
Worksheets.Add 'Inserts a new sheet before active sheet
Worksheets.Add After:=Worksheets(Worksheets.Count) 'Inserts sheet at the end
Worksheets.Add After:=Worksheets("VBA") 'Inserts sheet after a specific sheet (for ex. "VBA" sheet)
Sheets.Add(After:=Sheets(Sheets.Count)).Name = "Excel" 'Inserts a sheet at the end with the name of "Excel"
End SubSub deletesheets()
ActiveSheet.Delete 'Deletes active sheet
Sheets("VBA").Delete 'Deletes the sheet with the name "VBA"
Sheet(3).Delete 'Deletes the third sheet of the workbook
Application.DisplayAlerts = False: Sheets("Sheet1").Delete: Application.DisplayAlerts = True 'Disables delete confirmation box while deleting the sheet
Sheets(Array("VBA", "Excel", "Budget")).Delete 'Delete multiple sheets at once
End SubVBA Code for Creating Workbooks
Sub addworkbook()

Workbooks.Add 'Adds a new empty workbook
Workbooks.Add.SaveAs "D:\VBA Practice.xlsx" 'Adds new workbook and saves it in D drive with name of "VBA Practice"

End sub
VBA Code for Sheet Referencing
In above code examples, every line of code runs in the active sheet only or the sheet which is currently selected. What if you want to run the code in specific sheet only regardless of which over sheet is selected or active. For this, we have to reference the sheet where we want to tun the code. Use below code for sheet referencing.
Sub sheetreferencing()

ThisWorkbook.Sheets("Excel").Range("A1").Value = "VBA"

End Sub
Above code writes the text “VBA” in the A1 cell of “Excel” sheet.
Sub sheetreferencing()

ThisWorkbook.Sheets(3).Range("D1").Value = "VBA"

End Sub
Above code writes the text “VBA” in the D1 cell of third sheet of the workbook.
Chapter 4: Variables in VBA and Data Types
What is Variable in VBA
In VBA, a variable is a named storage location in memory that holds data which can be changed during program execution. It acts as a container for information such as numbers, text, dates, or objects. Variables are essential because they allow you to write flexible and efficient code—instead of repeatedly using hard-coded values, you can store and manipulate data dynamically. By using meaningful variable names, you make your code easier to read, debug, and maintain, while also enabling tasks like calculations, data processing, and user interaction within your macros and applications.
Variable Data Types
In VBA, a variable data type defines the kind of data a variable can store, such as an integer, text string, or date. It specifies the nature of the information (like Integer for whole numbers or String for text) and determines how much memory is allocated. Defining a data type is critically important for three main reasons: it ensures program efficiency by using only the necessary memory, it enforces data integrity by preventing incorrect operations (like trying to add text to a number), and it improves code clarity and reliability by explicitly stating what kind of data is being used, which helps prevent errors and makes the program run faster and more predictably.
Below are the variable data types, memory they take, their use and example.
| Category | Data Type Name | Approx. Memory Consumption | Use | Example |
|---|---|---|---|---|
| Numeric | Byte | 1 Byte | Store small positive numbers (0 to 255) | Age, Loan Period in Years etc. |
| Numeric | Integer | 2 Bytes | Store small range of whole numbers (-32768 to 32767) | Employee ID, Product ID or whatever that falls within this range |
| Numeric | Long | 4 Bytes | Store large range of whole numbers (-2147483648 to 2147483647) | Row Number, Transaction IDs |
| Numeric | LongLong | 8 Bytes | Store extremely large range of whole numbers (-9,223,372,036,854,775,808 to +9,223,372,036,854,775,807) | Supported in 64 bit Excel and Versions 2016 and later. Example: to handle very big file size |
| Numeric | Single | 4 Bytes | Store Numbers with Decimal (floating numbers). Generally, handles 6-7 numbers. like 10.4432 or 1233.366 etc. If exceeds 6-7 digits, rounding may occur. | Small floating numbers (percentage calculation) |
| Numeric | Double | 8 Bytes | Stores numbers with decimal (floating numbers). Handles large numbers like 15 to 16 digits. In modern Excel, using Double data type is recommended for decimal numbers (floating numbers). | Large floating numbers (scientific, engineering or statistical calculations) |
| Numeric | Currency | 8 Bytes | Holds number with decimal with exact digit after decimal of 4 digits. | calculation of currency numbers (invoice amounts, taxes, exchange rates etc.) |
| Text | String | 10 Bytes for Descriptor + 2 Bytes per Character | Holds text values | Product Name, Employee Name, City Name etc. |
| Date & Time | Date | 8 Bytes | Holds date and time values | start date, end date, schedule, event date time etc. |
| Logical | Boolean | 2 Bytes | Holds True or False Values | Yes No values, Active Passive values etc. |
| Object | Worksheet, Workbooks, Range etc. | 8 Bytes (64 bit) / 4 Bytes (32 bit) | Holds name of different Excel objects like sheet, range, forms etc. | Worksheet, Range, Cell, Userform, Dictionary |
| Variant | Variant | 16 Bytes + Memory Consumption of Each Data Type | Hold any type of data (when the data type is unknown or flexible) | If Cell A1 may have any type of data like text, number or date |